To weatherproof your fan blades, choose high-quality exterior paints like enamel or acrylic that resist moisture, UV rays, and temperature changes. Properly prep the surface by cleaning and lightly sanding, then apply thin, even coats with a high-quality brush or spray, allowing each layer to dry thoroughly. Use smooth, steady strokes for a sleek, durable finish. For more detailed tips on ensuring a professional look that lasts, continue exploring these essential weatherproofing techniques.
Key Takeaways
- Choose high-quality exterior or weatherproof paints formulated to resist moisture, UV rays, and temperature changes for long-lasting protection.
- Prepare fan blades by cleaning, sanding, and drying thoroughly to ensure optimal paint adhesion and a smooth finish.
- Use thin, even coats of paint, allowing each layer to dry completely before applying the next for a durable, weather-resistant surface.
- Select appropriate brushes or spray tips to achieve a professional, uniform application, paying attention to detail on edges and intricate areas.
- Work in a well-ventilated, well-lit space, and follow manufacturer drying times to prevent smudging, ensuring a weatherproof, long-lasting finish.
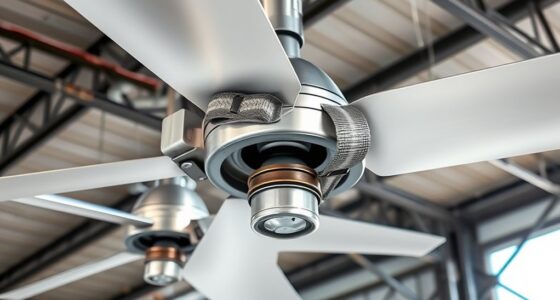
Have you ever wondered how to give your ceiling fan a fresh new look? Refinishing your fan blades can transform the room’s ambiance, but it requires careful preparation and the right approach. Starting with brush techniques and paint selection is essential to ensuring a smooth, durable finish that withstands weather conditions and daily use. When choosing your paint, opt for high-quality, weatherproof or exterior-rated paints designed to resist moisture, UV rays, and temperature fluctuations. These paints are formulated to adhere well to various surfaces and maintain their color over time, preventing chipping or fading. Picking the right paint type—like enamel or acrylic—also makes a difference, as they provide a tough, glossy finish that’s easier to clean and more resistant to the elements.
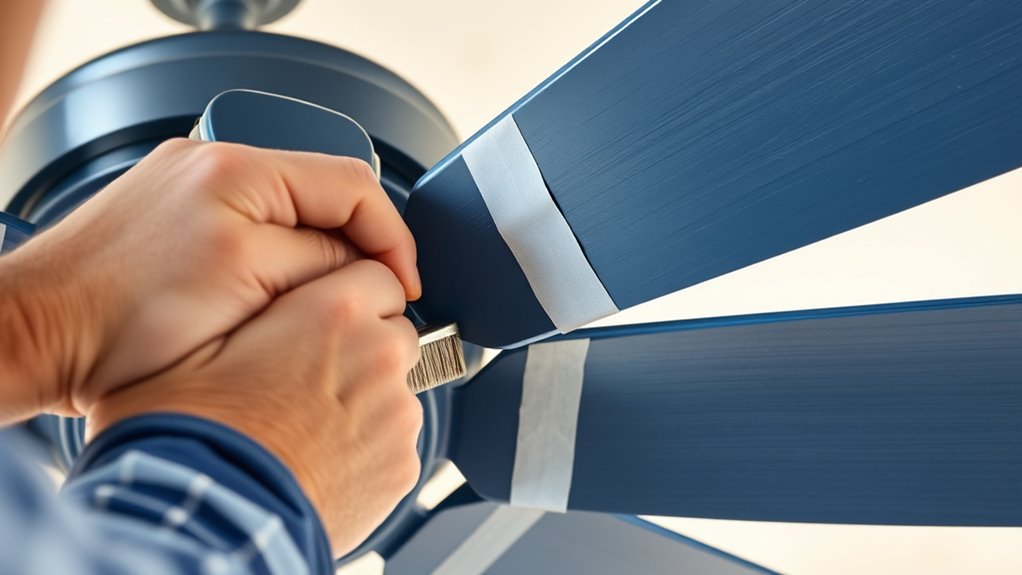
Once you’ve selected your paint, it’s time to focus on brush techniques. Proper brushwork is critical for achieving a professional look and ensuring even coverage. Use high-quality brushes with synthetic bristles for smooth application, especially when working with latex or acrylic paints. Before you start, clean your fan blades thoroughly to remove dust, grease, or old paint that might interfere with adhesion. Lightly sand the surface, especially if it’s glossy, to create a better grip for the new paint. When applying paint, use long, even strokes and work in a well-lit area to see where you’ve already painted. Avoid pressing too hard, as this can cause brush marks or uneven texture. Instead, let the brush do the work, maintaining a steady hand for consistent coverage. Additionally, selecting the appropriate tip size can influence the spray pattern and help achieve a more uniform finish if you opt for spray application instead of brushes.
To further improve your results, consider using a foam or roller brush for larger, flat areas, but always finish with a brush to reach into corners and edges. Apply thin coats rather than thick ones, allowing each layer to dry thoroughly before adding the next. This technique helps prevent drips and ensures a smooth, professional finish. When painting near the edges or intricate parts, switch to smaller, detail brushes to maintain precision. Always work in a well-ventilated space and follow the manufacturer’s drying times to avoid smudging or uneven drying.
Frequently Asked Questions
How Often Should Fan Blades Be Painted or Refinished?
You should repaint or refinish your fan blades every 2 to 3 years to maintain paint durability and guarantee seasonal maintenance. Regularly inspecting them for chips, cracks, or fading helps you catch issues early. Weatherproofing your blades with weather-resistant paint extends their lifespan and keeps them looking fresh. Consistent upkeep not only protects your fan but also improves its performance and aesthetic appeal over time.
Can I Use Spray Paint on Fan Blades?
Yes, you can use spray paint on fan blades, but choose a high-quality, weather-resistant spray paint designed for outdoor use. Make sure to clean the blades thoroughly and lightly sand them to help the paint adhere better. Apply thin, even coats, and let each layer dry completely before adding another. This method provides a smooth finish and helps protect your fan blades from weather damage.
What Types of Paint Are Best for Outdoor Fan Blades?
You should choose outdoor-grade acrylic or latex paints for your fan blades, as they offer excellent outdoor durability and better paint adhesion. These paints resist weather elements like rain and sun, preventing chipping and fading. Make certain to clean and sand the blades beforehand for maximum adhesion. Using the right type of paint ensures your fan blades stay vibrant and protected against the elements, extending their lifespan effectively.
Is It Necessary to Remove the Fan Blades Before Painting?
Removing blades before painting is like taking out the trash before a cleanup—you get better results. It’s recommended because it allows you to apply painting techniques more precisely and evenly, avoiding drips or missed spots. Plus, you’ll prevent overspray on other surfaces. Carefully detach the blades, paint thoroughly, and let them dry before reattaching. This ensures a smooth, professional finish that withstands weather conditions.
How Do I Prevent Paint From Chipping Over Time?
To prevent paint from chipping over time, focus on proper surface preparation and paint adhesion. Clean the blades thoroughly to remove dirt and grease, then lightly sand the surface to create better grip. Use a high-quality, weatherproof paint designed for outdoor use, and apply multiple thin coats rather than one thick one. Finally, let each coat dry completely before applying the next to guarantee a durable, long-lasting finish.
Conclusion
So, after all that painting and weatherproofing, your fan blades are now practically indestructible—except, of course, when they inevitably collect dust or get splattered with pollen. Ironically, all your efforts to protect them from the elements might just be undone by a sneaky layer of grime. But hey, at least you can enjoy the satisfaction of knowing you’ve turned your fan into a tiny fortress—until the next outdoor storm or a curious breeze.